

Silahkan perhatikan step di bawah ini.

Untuk dapat melakukan praktikum ini dengan baik dan lancar silahkan perhatikan detail pada setiap stepnya, baik baris perintah dan baris konfigurasi server
STEP 1 – CREATE VPS
Pada step 1 silahkan create vps dengan spesifikasi minimum 1 core VCPU, 1GB VMemory dan 20GB Storage. Seperti Video 1
STEP 2 – Change Root Password Almalinux
Pada step ke 2 silahkan ganti password root almalinux menggunakan perintah di bawah ini atau video 2.
[firmanprtama@Almalinux ~]$ sudo su
[root@Almalinux firmanprtama]# passwd root
Changing password for user root.
New password:
Retype new password:
passwd: all authentication tokens updated successfully.
[root@Almalinux firmanprtama]#
STEP 3 – Add Repository, Update & Install App Almalinux
Selanjutnya silahkan install repository tambahan dan mengupdate app Almalinux dengan perintah di bawah ini atau video 2.
Untuk meminimalisir putusnya koneksi ssh antara putty dan VPS silahkan melakukan eksekusi perintah di bawah ini langsung dari virtual console VPS.
[root@Almalinux ~]# dnf install epel-release
[root@Almalinux firmanprtama]# dnf update -ySTEP 4 – Install Basic App Almalinux
Untuk mendukung operasional web-server, silahkan install aplikasi berikut via putty
[root@Almalinux firmanprtama]# dnf install nano mc wget firewalld clamav nmap htop zip unzipSTEP 5 – Disable SELinux
Check konfigurasi SELinux pada almalinux. dengan perintah di bawah ini.
[root@Almalinux firmanprtama]# sestatusPastikan konfigurasi SELinux adalah terdisable
Jika belum silahkan konfigurasi pada file “config” di dalam folder “/etc/selinux” menggunakan software teks editor nano seperti perintah di bawah ini.
[root@Almalinux firmanprtama]# nano /etc/selinux/config
SELINUX=disabled
Selanjutnya restart VPS dengan perintah di bawah ini.
[root@Almalinux firmanprtama]# rebootSTEP 6 – Activate Firewalld Service
Silahkan check service firewalld
[root@Almalinux firmanprtama]# systemctl status firewalldJika service firewalld belum aktif/running silahkan menjalankan perintah di bawah ini
[root@Almalinux firmanprtama]# systemctl start firewalldSelanjutnya buat service firewalld menjadi automatis running ketika server di jalankan dengan perintah di bawah ini
[root@Almalinux firmanprtama]# systemctl enable firewalldSilahkan check kembali service firewalld
[root@Almalinux firmanprtama]# systemctl status firewalldNote:
Default service Firewalld secara otomatis menutup akses ke semua port yang mengarah ke dalam server.
Jika ada aplikasi yang membutuhkan akses incoming silahkan Allow pada konfigurasi firewalldSTEP 7 – Install Apache Web Server, Activate Apache Service & Open Port Apache Service
Eksekusi perintah di bawah ini untuk menginstall apache webserver & certbot untuk instalasi sertifikat SSL.
[root@Almalinux firmanprtama]# dnf install httpd httpd-tools certbot python3-certbot-apache mod_sslSetelah selesai install, check konfigurasi service aplikasi webserver apache atau httpd dengan perintah dibawah ini
[root@Almalinux firmanprtama]# systemctl status httpdJika service httpd belum berjalan silahkan jalankan dengan perintah dibawah ini
[root@Almalinux firmanprtama]# systemctl start httpdSelanjutnya buat service apache/httpd menjadi automatis running ketika server di jalankan dengan perintah di bawah ini
[root@Almalinux firmanprtama]# systemctl enable httpd
Silahkan check kembali status apache/httpd service
[root@Almalinux firmanprtama]# systemctl status httpdBuka port 80(http) dan 443(https) dengan transfer protocol TCP pada firewall agar service apache webserver dapat berjalan dengan perintah dibawah ini
[root@Almalinux firmanprtama]#	firewall-cmd --permanent --zone=public --add-port=80/tcp
success
[root@Almalinux firmanprtama]#	firewall-cmd --permanent --zone=public --add-port=443/tcp
success
Setelah berhasil ditambahkan konfigurasi di atas, silahkan reload konfigurasi firewall.
[root@Almalinux firmanprtama]# firewall-cmd --reloadSelanjutnya pastikan port 80 dan 443 dengan transfer protocol tcp terbuka dengan perintah dibawah ini dan menghasilkan output seperti di bawah ini
[root@Almalinux firmanprtama]# firewall-cmd --list-allpublic (active)
target: default
icmp-block-inversion: no
interfaces: eth0
sources:
services: cockpit dhcpv6-client ssh
ports: 80/tcp 443/tcp
protocols:
forward: no
masquerade: no
forward-ports:
source-ports:
icmp-blocks:
rich rules:Selanjutnya akses IP server atau domain server pada browser, jika berhasil akan muncul seperti gambar berikut.
http://IPSERVER
atau
http://DomainServer

Contoh
http://103.176.79.213
atau
http://firman.kelompoksaya.my.id
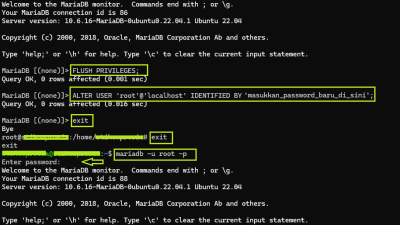
STEP 8 – Install MariaDB, Activate MariaDB Service & Configure Root Password MariaDB v10.6
Tambahkan repository mariadb versi 10.6 dengan cara membuat file baru yang bernama “mariadb.repo” di dalam folder “/etc/yum.repos.d/“.
Untuk menambahkan file “mariadb.repo” dapat menggunakan aplikasi teks editor nano
[root@localhost ~]# nano /etc/yum.repos.d/mariadb.repoMasukan baris di bawah ini pada file “mariadb.repo” lalu simpan (ctrl + x > y > [enter])
[mariadb]
name = MariaDB
baseurl = http://yum.mariadb.org/10.6/rhel8-amd64
module_hotfixes=1
gpgkey=https://yum.mariadb.org/RPM-GPG-KEY-MariaDB
gpgcheck=1
Selanjutnya update repository mariadb dengan perintah dibawah ini
[root@localhost ~]# dnf update -yLangkah selanjutnya adalah menginstall mariadb server & client dengan perintah di bawah ini.
[root@localhost ~]# dnf install mariadb-server mariadb -yApabila proses instalasi telah selesai jalankan service mariadbserver menggunakan perintah di bawah ini.
[root@localhost ~]# systemctl start mariadbAgar service mariadbserver berjalan otomatis ketika server dijalankan/dinyalakan silahkan eksekusi perintah di bawah ini
[root@localhost ~]# systemctl enable mariadbUntuk memastikan service mariadb server berjalan silahkan check menggunakan perintah di bawah ini.
[root@localhost ~]# systemctl status mariadbJika service mariadbserver telah berjalan, langkah selanjutnya adalah melakukan konfigurasi pada user root mariadb dengan perintah dibawah ini
[root@localhost ~]# mariadb-secure-installationTahapan konfigurasi mariadbserver pertama kali
*JALANKAN SECARA HATI-HATI
NOTE: RUNNING ALL PARTS OF THIS SCRIPT IS RECOMMENDED FOR ALL MariaDB
SERVERS IN PRODUCTION USE!PLEASE READ EACH STEP CAREFULLY!

In order to log into MariaDB to secure it, we'll need the current
password for the root user. If you've just installed MariaDB, and
haven't set the root password yet, you should just press enter here.

Enter current password for root (enter for none):[enter]
OK, successfully used password, moving on...

Setting the root password or using the unix_socket ensures that nobody
can log into the MariaDB root user without the proper authorisation.

You already have your root account protected, so you can safely answer 'n'.

Switch to unix_socket authentication [Y/n] y
Enabled successfully!
Reloading privilege tables..
 ... Success!


You already have your root account protected, so you can safely answer 'n'.

Change the root password? [Y/n] y
New password:[masukkan password root database Mariadb] [enter]
Re-enter new password: [masukkan password root database Mariadb] [enter]
Password updated successfully!
Reloading privilege tables..
 ... Success!


By default, a MariaDB installation has an anonymous user, allowing anyone
to log into MariaDB without having to have a user account created for
them.This is intended only for testing, and to make the installation
go a bit smoother.You should remove them before moving into a
production environment.

Remove anonymous users? [Y/n] y
 ... Success!

Normally, root should only be allowed to connect from 'localhost'.This
ensures that someone cannot guess at the root password from the network.

Disallow root login remotely? [Y/n] y
 ... Success!

By default, MariaDB comes with a database named 'test' that anyone can
access.This is also intended only for testing, and should be removed
before moving into a production environment.

Remove test database and access to it? [Y/n] y
 - Dropping test database...
 ... Success!
 - Removing privileges on test database...
 ... Success!

Reloading the privilege tables will ensure that all changes made so far
will take effect immediately.

Reload privilege tables now? [Y/n] y
 ... Success!

Cleaning up...

All done!If you've completed all of the above steps, your MariaDB
installation should now be secure.

Thanks for using MariaDB!
Selanjutnya test user root DBMS MariDB dari normal/standar user terminal
[firmanprtama@Almalinux ~]$
Lalu login ke mariadbserver menggunakan perintah di bawah ini lalu check database yang telah ada pada mariadbserver.
[firmanprtama@Almalinux ~]$ mariadb -u root -p
Enter password:
Welcome to the MariaDB monitor.  Commands end with ; or \g.
Your MariaDB connection id is 15
Server version: 10.6.8-MariaDB MariaDB Server

Copyright (c) 2000, 2018, Oracle, MariaDB Corporation Ab and others.

Type 'help;' or '\h' for help. Type '\c' to clear the current input statement.

MariaDB [(none)]> show databases;
+--------------------+
| Database           |
+--------------------+
| information_schema |
| mysql              |
| performance_schema |
| sys                |
+--------------------+
4 rows in set (0.002 sec)

MariaDB [(none)]>
STEP 9 – Install PHP v7.4
Tahap awal untuk menginstall php versi 7.4 adalah mengecek module instalasi php yang aktif dengan perintah di bawah ini.
[root@Almalinux firmanprtama]# dnf module list phpJika module instalasi php yang aktif masih php selain versi php 7.4 silahkan reset menggunakan perintah berikut
[root@Almalinux firmanprtama]# dnf module reset phpUntuk mengaktifkan module instalasi php 7.4 silahkan gunakan perintah berikut
[root@Almalinux firmanprtama]# dnf module enable php:7.4Selanjutnya silahkan eksekusi perintah di bawah ini untuk menginstall PHP packages di server Anda
dnf install php php-common php-opcache php-cli php-gd php-curl php-mysqlnd php-zip php-posix php-intl php-xmlrpc php-soap libsodium libsodium-develJika proses instalasi telah selesai, silahkan check versi php menggunakan perintah berikut
[root@localhost ~]#	php -v
PHP 7.4.19 (cli) (built: May4 2021 11:06:37) ( NTS )
Copyright (c) The PHP Group
Zend Engine v3.4.0, Copyright (c) Zend Technologies
with Zend OPcache v7.4.19, Copyright (c), by Zend Technologies
Untuk mengoptimasi webserver silahkan mengaktifkan FPM (FastCGI Process Manager) atau php-fpm
[root@Almalinux firmanprtama]# systemctl start php-fpmAutomasi service FPM (FastCGI Process Manager) atau php-fpm menggunakan perintah berikut.
[root@Almalinux firmanprtama]# systemctl enable php-fpm
Untuk mengecek service FPM (FastCGI Process Manager) atau php-fpm silahkan jalankan perintah berikut.
[root@Almalinux firmanprtama]# systemctl status php-fpm
● php-fpm.service - The PHP FastCGI Process Manager
   Loaded: loaded (/usr/lib/systemd/system/php-fpm.service; enabled; vendor preset: disabled)
   Active: active (running) since Thu 2022-06-16 17:02:04 WIB; 10min ago
 Main PID: 879 (php-fpm)
   Status: "Processes active: 0, idle: 5, Requests: 0, slow: 0, Traffic: 0req/sec"
    Tasks: 6 (limit: 11352)
   Memory: 41.7M
   CGroup: /system.slice/php-fpm.service
           ├─879 php-fpm: master process (/etc/php-fpm.conf)
           ├─917 php-fpm: pool www
           ├─918 php-fpm: pool www
           ├─919 php-fpm: pool www
           ├─920 php-fpm: pool www
           └─921 php-fpm: pool www

Jun 16 17:02:03 localhost.localdomain systemd[1]: Starting The PHP FastCGI Process Manager...
Jun 16 17:02:04 localhost.localdomain systemd[1]: Started The PHP FastCGI Process Manager.
Buka file “php.ini” di dalam folder “/etc/” menggunakan perintah berikut
[root@Almalinux firmanprtama]# nano /etc/php.iniCari dan ubah bari konfigurasi pada file “php.ini” di dalam folder “/etc/” dari [default] ke [custom] seperti contoh di bawah ini
*Gunakan CTRL + W untuk mencari baris berikut pada aplikasi text editor nano
# [default]
max_execution_time = 30
max_input_time = 60
max_input_vars = 1000
memory_limit = 128M
upload_max_filesize = 2M
post_max_size = 8M
Ubah dari [default] ke [custom]
# [custom]
max_execution_time = 300
max_input_time = 600
max_input_vars = 10000
memory_limit = 128M
upload_max_filesize = 100M
post_max_size = 100M
Selanjutnya restart service Apache dan FPM (FastCGI Process Manager)
[root@Almalinux firmanprtama]# systemctl restart httpd
[root@Almalinux firmanprtama]# systemctl restart php-fpm
Buat file “info.php” di dalam folder “/var/www/html/” untuk mengecek konfigurasi webserver
[root@localhost ~]# nano /var/www/html/info.phpCopy paste baris di bawah ini
<?php

   // Show all information, defaults to INFO_ALL
   phpinfo();

   // Show just the module information.
   // phpinfo(8) yields identical results.
   phpinfo(INFO_MODULES);

?>
Check konfigurasi webserver dengan mengakses file info.php melalui browser
http://IPSERVER/info.php
http://DomainServer/info.php

Contoh
http://103.176.79.213/info.php
atau
http://firman.kelompoksaya.my.id/info.php
STEP 10 – Install PHPMyAdmin (v5.1.1)
Instalasi phpmyadmin di mulai dari proses download file installer phpmyadmin,
untuk memudahkan silahkan masuk ke dalam folder root (/root) terlebih dahulu seperti perintah di bawah ini
[root@Almalinux firmanprtama]# cd /rootCheck isi folder /root/
[root@Almalinux ~]# lsDownload file installer phpmyadmin
[root@Almalinux ~]# wget https://repo.firmanpratama.id/phpmyadmin/phpMyAdmin-5.1.1-all-languages.zip
--2022-06-16 17:40:52--  https://repo.firmanpratama.id/phpmyadmin/phpMyAdmin-5.1.1-all-languages.zip
Resolving repo.firmanpratama.id (repo.firmanpratama.id)... 104.21.14.56, 172.67.158.23, 2606:4700:3037::6815:e38, ...
Connecting to repo.firmanpratama.id (repo.firmanpratama.id)|104.21.14.56|:443... connected.
HTTP request sent, awaiting response... 200 OK
Length: 14801905 (14M) [application/zip]
Saving to: ‘phpMyAdmin-5.1.1-all-languages.zip’

phpMyAdmin-5.1.1-all-languages.zip              100%[=======================================================================================================>]  14.12M  10.9MB/s    in 1.3s

2022-06-16 17:40:53 (10.9 MB/s) - ‘phpMyAdmin-5.1.1-all-languages.zip’ saved [14801905/14801905]
Note :
Official site download phpmyadmin
https://www.phpmyadmin.net/downloads/
Check file hasil download phpMyAdmin-5.1.1-all-languages.zip dalam folder /root jika ada dapat lanjut ke tahapan berikutnya.
[root@Almalinux ~]# ls
anaconda-ks.cfg  phpMyAdmin-5.1.1-all-languages.zip
Ekstract/unzip file “phpMyAdmin-5.1.1-all-languages.zip” menjadi folder “phpMyAdmin-5.1.1-all-languages” dengan perintah di bawah ini
[root@Almalinux ~]# unzip phpMyAdmin-5.1.1-all-languages.zip
.......................................................
......................................................
.....................................................
....................................................
...................................................
inflating: phpMyAdmin-5.1.1-all-languages/vendor/williamdes/mariadb-mysql-kbs/src/SlimData.php
inflating: phpMyAdmin-5.1.1-all-languages/yarn.lock
Pindahkan folder “phpMyAdmin-5.1.1-all-languages” ke dalam folder “/usr/share/” serta di rename menjadi “phpmyadmin” dengan perintah berikut.
[root@Almalinux ~]# mv phpMyAdmin-5.1.1-all-languages /usr/share/phpmyadmin/Masuk kedalam folder phpmyadmin di “/usr/share/phpmyadmin/”
[root@Almalinux ~]# cd /usr/share/phpmyadmin/Check file phpmyadmin menggunakan perintah berikut
[root@Almalinux phpmyadmin]# ls
babel.config.json      examples     package.json            sql
ChangeLog              favicon.ico  print.css               templates
composer.json          index.php    README                  themes
composer.lock          js           RELEASE-DATE-5.1.1      url.php
config.sample.inc.php  libraries    robots.txt              vendor
CONTRIBUTING.md        LICENSE      setup                   yarn.lock
doc                    locale       show_config_errors.php
Rename file “config.sample.inc.php” menjadi “config.inc.php” menggunakan perintah berikut
[root@Almalinux phpmyadmin]# mv config.sample.inc.php config.inc.phpCheck apakah file “config.sample.inc.php” sudah berubah menjadi “config.inc.php” menggunakan perintah berikut
[root@Almalinux phpmyadmin]# ls
babel.config.json  examples     package.json            sql
ChangeLog          favicon.ico  print.css               templates
composer.json      index.php    README                  themes
composer.lock      js           RELEASE-DATE-5.1.1      url.php
config.inc.php     libraries    robots.txt              vendor
CONTRIBUTING.md    LICENSE      setup                   yarn.lock
doc                locale       show_config_errors.php
Generate kode yang akan digunakan sebagai blufish code phpmyadmin pada file config.inc.php menggunakan perintah berikut.
[root@Almalinux phpmyadmin]# openssl rand -base64 32
Kode Hasil Generate Secret Code Copy Paste di bawah ini
[My Secret Code] = aq9Cpi0gNsld3SE50Ys32IJhZ4B+Xb7IkMPILeHWlG8=
Kode hasil generate
aq9Cpi0gNsld3SE50Ys32IJhZ4B+Xb7IkMPILeHWlG8=Buka file “config.inc.php” di dalam folder “/usr/share/phpmyadmin/”
[root@Almalinux phpmyadmin]# nano config.inc.php- Tambahkan masukkan kode hasil generate dalam file config.inc.php
- Tambahkan baris $cfg[‘TempDir’] = ‘/tmp’; dalam file config.inc.php
$cfg['blowfish_secret'] = 'MASUKKAN_KODE_HASIL_GENERATE_DI_SINI'; /* YOU MUST FILL IN THIS FOR COOKIE AUTH! */
$cfg['TempDir'] = '/tmp';
Berikut adalah contoh konfigurasi pada file config.inc.php di dalam folder /usr/share/phpmyadmin
<?php
/**
 * phpMyAdmin sample configuration, you can use it as base for
 * manual configuration. For easier setup you can use setup/
 *
 * All directives are explained in documentation in the doc/ folder
 * or at <https://docs.phpmyadmin.net/>.
 */

declare(strict_types=1);

/**
 * This is needed for cookie based authentication to encrypt password in
 * cookie. Needs to be 32 chars long.
 */
$cfg['blowfish_secret'] = 'aq9Cpi0gNsld3SE50Ys32IJhZ4B+Xb7IkMPILeHWlG8='; /* YOU MUST FILL IN THIS FOR COOKIE AUTH! */
$cfg['TempDir'] = '/tmp';
/**
 * Servers configuration
 */
$i = 0;

/**
 * First server
 */
$i++;
/* Authentication type */
$cfg['Servers'][$i]['auth_type'] = 'cookie';
/* Server parameters */
$cfg['Servers'][$i]['host'] = 'localhost';
$cfg['Servers'][$i]['compress'] = false;
$cfg['Servers'][$i]['AllowNoPassword'] = false;

/**
 * phpMyAdmin configuration storage settings.
 */

/* User used to manipulate with storage */
// $cfg['Servers'][$i]['controlhost'] = '';
// $cfg['Servers'][$i]['controlport'] = '';
// $cfg['Servers'][$i]['controluser'] = 'pma';
// $cfg['Servers'][$i]['controlpass'] = 'pmapass';

/* Storage database and tables */
// $cfg['Servers'][$i]['pmadb'] = 'phpmyadmin';
// $cfg['Servers'][$i]['bookmarktable'] = 'pma__bookmark';
// $cfg['Servers'][$i]['relation'] = 'pma__relation';
// $cfg['Servers'][$i]['table_info'] = 'pma__table_info';
// $cfg['Servers'][$i]['table_coords'] = 'pma__table_coords';
// $cfg['Servers'][$i]['pdf_pages'] = 'pma__pdf_pages';
// $cfg['Servers'][$i]['column_info'] = 'pma__column_info';
// $cfg['Servers'][$i]['history'] = 'pma__history';
// $cfg['Servers'][$i]['table_uiprefs'] = 'pma__table_uiprefs';
// $cfg['Servers'][$i]['tracking'] = 'pma__tracking';
// $cfg['Servers'][$i]['userconfig'] = 'pma__userconfig';
// $cfg['Servers'][$i]['recent'] = 'pma__recent';
// $cfg['Servers'][$i]['favorite'] = 'pma__favorite';
// $cfg['Servers'][$i]['users'] = 'pma__users';
// $cfg['Servers'][$i]['usergroups'] = 'pma__usergroups';
// $cfg['Servers'][$i]['navigationhiding'] = 'pma__navigationhiding';
// $cfg['Servers'][$i]['savedsearches'] = 'pma__savedsearches';
// $cfg['Servers'][$i]['central_columns'] = 'pma__central_columns';
// $cfg['Servers'][$i]['designer_settings'] = 'pma__designer_settings';
// $cfg['Servers'][$i]['export_templates'] = 'pma__export_templates';

/**
 * End of servers configuration
 */

/**
 * Directories for saving/loading files from server
 */
$cfg['UploadDir'] = '';
$cfg['SaveDir'] = '';

/**
 * Whether to display icons or text or both icons and text in table row
 * action segment. Value can be either of 'icons', 'text' or 'both'.
 * default = 'both'
 */
//$cfg['RowActionType'] = 'icons';

/**
 * Defines whether a user should be displayed a "show all (records)"
 * button in browse mode or not.
 * default = false
 */
//$cfg['ShowAll'] = true;

/**
 * Number of rows displayed when browsing a result set. If the result
 * set contains more rows, "Previous" and "Next".
 * Possible values: 25, 50, 100, 250, 500
 * default = 25
 */
//$cfg['MaxRows'] = 50;

/**
 * Disallow editing of binary fields
 * valid values are:
 *   false    allow editing
 *   'blob'   allow editing except for BLOB fields
 *   'noblob' disallow editing except for BLOB fields
 *   'all'    disallow editing
 * default = 'blob'
 */
//$cfg['ProtectBinary'] = false;

/**
 * Default language to use, if not browser-defined or user-defined
 * (you find all languages in the locale folder)
 * uncomment the desired line:
 * default = 'en'
 */
//$cfg['DefaultLang'] = 'en';
//$cfg['DefaultLang'] = 'de';

/**
 * How many columns should be used for table display of a database?
 * (a value larger than 1 results in some information being hidden)
 * default = 1
 */
//$cfg['PropertiesNumColumns'] = 2;

/**
 * Set to true if you want DB-based query history.If false, this utilizes
 * JS-routines to display query history (lost by window close)
 *
 * This requires configuration storage enabled, see above.
 * default = false
 */
//$cfg['QueryHistoryDB'] = true;

/**
 * When using DB-based query history, how many entries should be kept?
 * default = 25
 */
//$cfg['QueryHistoryMax'] = 100;

/**
 * Whether or not to query the user before sending the error report to
 * the phpMyAdmin team when a JavaScript error occurs
 *
 * Available options
 * ('ask' | 'always' | 'never')
 * default = 'ask'
 */
//$cfg['SendErrorReports'] = 'always';

/**
 * You can find more configuration options in the documentation
 * in the doc/ folder or at <https://docs.phpmyadmin.net/>.
 */
Buat folder “tmp” di dalam “/usr/share/phpmyadmin/” sebagai folder temporary menggunakan perintah berikut
[root@Almalinux phpmyadmin]# mkdir /usr/share/phpmyadmin/tmpUbah permision folder /tmp menjadi 777
[root@Almalinux phpmyadmin]# chmod -R 777 /usr/share/phpmyadmin/tmpUbah ownership folder phpmyadmin dari user & group root menjadi milik apache dengan perintah di bawah ini.
[root@Almalinux phpmyadmin]# chown -R apache:apache /usr/share/phpmyadminBuat file virtual host phpmyadmin dan silahkan custom untuk alias name
root@localhost ~]#	nano /etc/httpd/conf.d/phpmyadmin.conf

# Config Standar
# Alias /phpmyadmin /usr/share/phpmyadmin
Alias /firmanprtama /usr/share/phpmyadmin

<Directory /usr/share/phpmyadmin/>
   AddDefaultCharset UTF-8
   <IfModule mod_authz_core.c>
     # Apache 2.4
     <RequireAny>
      Require all granted
     </RequireAny>
   </IfModule>
</Directory>

<Directory /usr/share/phpmyadmin/setup/>
   <IfModule mod_authz_core.c>
# Apache 2.4
     <RequireAny>
       Require all granted
     </RequireAny>
   </IfModule>
</Directory>
Restart service Apache dan FPM (FastCGI Process Manager) menggunakan perintah di bawah
[root@localhost ~]#	systemctl restart httpd
[root@localhost ~]#	systemctl restart php-fpm
Akses phpmyadmin dari browser.
http://IPSERVER/alias
atau
http://DomainServer/alias

Contoh
http://103.176.79.213/firmanprtama
atau
http://firman.kelompoksaya.my.id/firmanprtama

STEP 11 – Install Webmin
Tambahkan file repository webmin di dalam folder /etc/yum.repos.d/
[root@localhost ~]#	nano /etc/yum.repos.d/webmin.repo
[Webmin]
name=Webmin
mirrorlist=https://download.webmin.com/download/yum/mirrorlist
enabled=1
gpgkey=http://www.webmin.com/jcameron-key.asc
Selanjutnya update dengan perintah dibawah ini
[root@Almalinux firmanprtama]# dnf update -yInstall webmin
[root@Almalinux firmanprtama]# dnf install webmin -yStart service webmin
[root@Almalinux firmanprtama]# systemctl start webminEnable service webmin
[root@Almalinux firmanprtama]# systemctl enable webminCheck status service webmin
[root@Almalinux firmanprtama]# systemctl status webmin
● webmin.service - Webmin server daemon
   Loaded: loaded (/usr/lib/systemd/system/webmin.service; enabled; vendor preset: disabled)
   Active: active (running) since Thu 2022-06-16 17:02:03 WIB; 3h 3min ago
  Process: 825 ExecStart=/etc/webmin/.start-init (code=exited, status=0/SUCCESS)
 Main PID: 861 (miniserv.pl)
    Tasks: 1 (limit: 11352)
   Memory: 140.5M
   CGroup: /system.slice/webmin.service
           └─861 /usr/bin/perl /usr/libexec/webmin/miniserv.pl /etc/webmin/miniserv.conf

Jun 16 17:01:59 localhost.localdomain systemd[1]: Starting Webmin server daemon...
Jun 16 17:01:59 localhost.localdomain .start-init[825]: Starting Webmin server in /usr/libexec/webmin
Jun 16 17:02:03 localhost.localdomain systemd[1]: Started Webmin server daemon.
Allow Port 10000 untuk service webmin pada firewalld
[root@Almalinux firmanprtama]# firewall-cmd --permanent --zone=public --add-port=10000/tcp
success
Reload konfigurasi firewall
[root@Almalinux firmanprtama]# firewall-cmd --reload
success
Check port yang diizinkan masuk oleh firewalld, pastikan port 10000 dengan transfer protocol tcp diizinkan masuk
[root@Almalinux firmanprtama]# firewall-cmd --list-all
public (active)
  target: default
  icmp-block-inversion: no
  interfaces: eth0
  sources:
  services: cockpit dhcpv6-client ssh
  ports: 80/tcp 443/tcp 10000/tcp
  protocols:
  forward: no
  masquerade: no
  forward-ports:
  source-ports:
  icmp-blocks:
  rich rules:
Silahkan akses webmin pada browser
https://IPSERVER:Port10000
atau
https://DomainServer:Port10000

Contoh
https://103.176.79.213:10000
atau
https://firman.kelompoksaya.my.id:10000


STEP 12 – Install WordPress on Almalinux